







Anyone can use the Microsoft 365 app for free to save and retrieve documents in the cloud via a Microsoft account. However, with a paid Microsoft 365 subscription youwill be able to tap into more online storage and take advantage of certain premium features in the app.
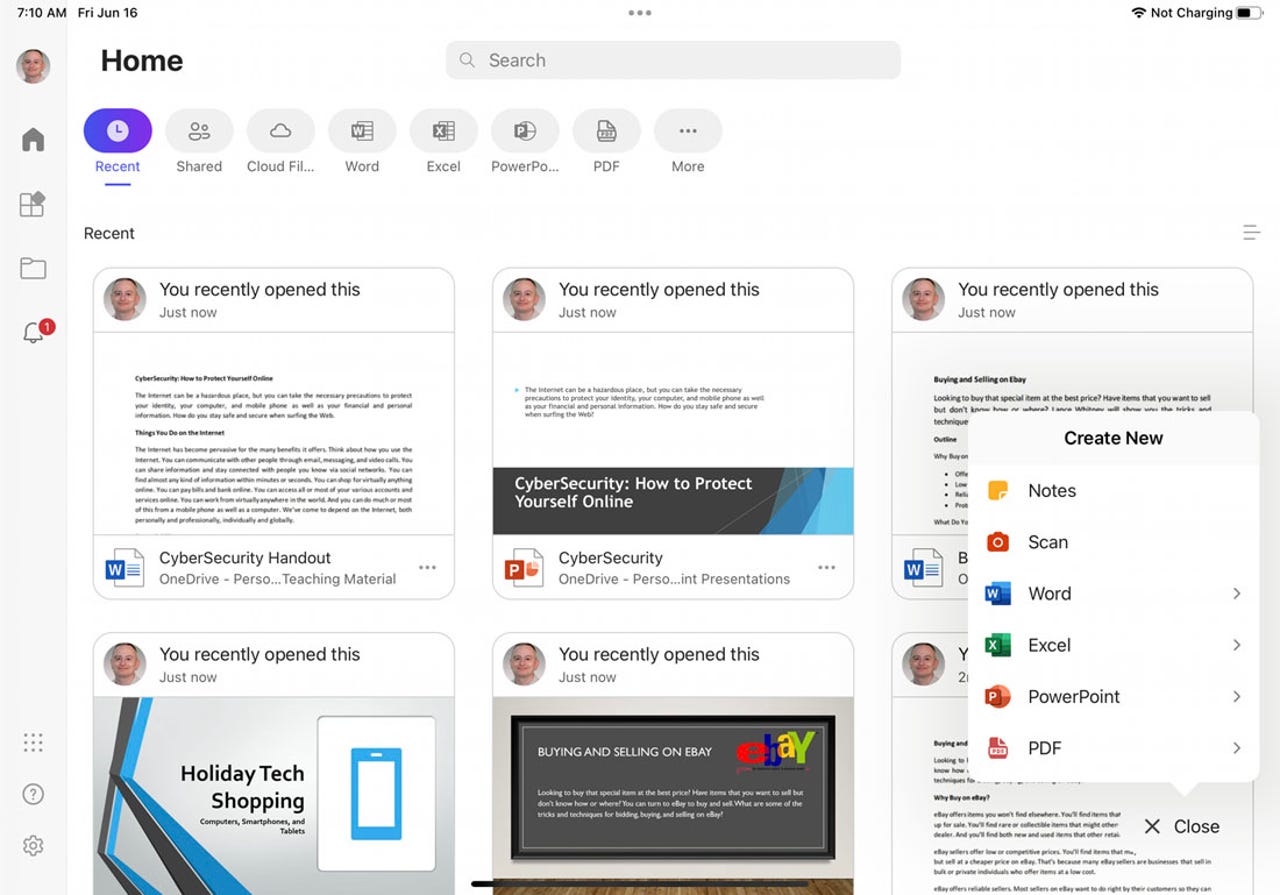
Screenshot by Lance Whitney/Microsoft offers separate mobile apps for Word, Excel, PowerPoint, and other programs. This means you have to switch from one app to another depending on the file you want to access. Instead, you may want to try the Microsoft 365 app, which lets you create and open any type of file across the suite. With this app, you can also share files, scan documents, work with PDFs, and convert an image to text or a table. Here's how it works.
First, anyone can use the Microsoft 365 app for free to save and retrieve documents in the cloud via a Microsoft account. Your files are housed in your OneDrive storage space. However, those of you with apaid Microsoft 365 subscription will be able to tap into more online storage and take advantage of certain premium features in the app.
Also: Understanding Microsoft's grand vision for building the next generation of apps
The layout for the app is the same for both iOS and Android. However, the layout does differ depending on whether you're using it on a phone or a tablet, though the basic features and commands are the same.
Here's what you do:
To get started, download and install the Microsoft 365 app for iOS/iPadOS or Android. If prompted, sign in with your Microsoft account so the app can tell whether or not you have a Microsoft 365 subscription.
Assuming you've already been using Microsoft 365 to create documents, spreadsheets, presentations, or other types of files, the app will display thumbnails for your most recent files right off the bat.
You can change the view to see other ranges of files. Among the icons at the top, tap the ones for Shared, Cloud Files, Pinned, Scans, and Video to see files in each category.
Also: For a better document collaboration experience, try these tips
You can add or remove different views. Tap the More icon at the top. In the first section, tap the minus sign for any views you don't wish to see. In the second section, tap the plus sign for any views you do wish to see. When finished, tap Done.
Swipe down the screen on any view to browse the list of recent files. Otherwise, type the full or partial name of a document in the search field to find specific files.
Another way to access your files and documents is to go directly to your OneDrive storage. Tap the Folder icon and select the entry for your OneDrive account. You can then drill down through your folders and subfolders to find the file you want.
Also: How to screen record in Windows 10 or Windows 11
On the left sidebar, tap the entry forFiles Appand then select a location, such as Google Drive or Box, to access any files stored in that service.
Next, tap the entry forAdd Storage Account. From here, you can add access to other online accounts, such as Box, Dropbox, and SharePoint.
Tap the file you wish to open. Using the built-in features and tools for Word, Excel, PowerPoint, or another app, you can edit the file as necessary. Any changes you make to the file are automatically saved and synced to the cloud.
Also: Your Microsoft apps are getting an AI revamp. Here's what we know
To create a new file, tap the Create button in the lower right and then choose the type of file you want to create -- Word, Excel, PowerPoint, etc. If you choose Word, you can opt to start by scanning text, using a blank document, or creating one from a template. For Excel, you're able to scan a table, use a blank workbook, or create one from a template. And for PowerPoint, you can start with a picture, use a blank presentation, or create one from a template.
If you opt to scan text to Word, your device's camera app will open. Position the printed document you want to scan. Tap the Shutter button in the camera app to scan the document. The scan then appears in an editor where you're able to delete or retake the scan as well as rotate or crop the image. When ready, tap the Next button. At the next screen, you can tweak the image further by adding filters, rotating it, applying text boxes, and marking it up. Tap Save, and the scanned text appears in Word.
If you choose to scan a printed table to Excel, tap the Shutter button. Crop the image if you wish and then tap Confirm. The data is then imported into a preview table where you're able to make any necessary adjustments. When done, tap Open to open it directly in Excel or Copy to paste the table elsewhere.
Next, you can use the app to generate PDFs. Click the Create button, choose PDF, and then select one of the three methods
 Горячие метки:
Услуги и программное обеспечение
3. Операционные системы
Ос для мобильных устройств