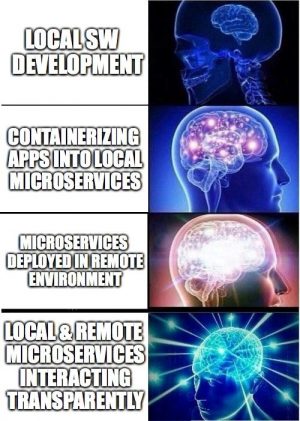


Telepresence|is|another useful tool that allows you to work from your laptop like you were inside a remote Kubernetes (k8s) cluster. This way you can easily do live debugging and testing of a service locally, while connected to a remote k8s cluster. For example you could be developing on a local microservice and have it interact with remote ones deployed in a Production environment.
Impossible? Not really! Let's give it a try to see how it works.
First you need to install it, and it will automatically work with the k8s cluster active in your kubectl configuration.
If you followed my previous DevOps Series posts, by now you should already know how to get a full myhero deployment working on your GKE cluster, so please go ahead and do it yourself. To make it simpler let's configure myhero in 'direct' mode, so no myhero-mosca or myhero-ernst is required. Remember you just need to comment with#the two lines in k8s_myhero_app.yml (under 'env' -'myhero_app_mode').
Please make sure to configure myhero-ui and myhero-app k8s services as 'LoadBalancer', so that they both get public IP addresses.
After deployment you should have the 3 required microservices: myhero-ui, myhero-app and myhero-data.
When you are ready you can try Telepresence in a couple of different ways:
1. Additional local deployment that communicates with the existing remote ones.
2. Replace an existing remote deployment with a local one.
In the first case you could run an additional container locally, and have full connectivity to the remote cluster, as if it were actually there. Let's try with an Alpine container and make it interact directly with myhero-data and myhero-app using their service names. Please note these service names are exclusively reachable inside the cluster, never from an external system like our laptop.
Start by running an Alpine container with Telepresence:
telepresence --docker-run -i -t alpine /bin/sh
And now from inside the Alpine container you may interact directly with the already deployed myhero containers:
apk add --no-cache curlcurl -X GET -H "key: SecureData" http://myhero-data/optionscurl -X GET -H "key: SecureApp" http://myhero-app/optionscurl http://myhero-ui
As you can see the additional local Alpine deployment can query existing remote microservices using k8s service names, that are only accessible by other containers inside the k8s cluster.
For the second case Telepresence allows you to replace an existing remote deployment in your k8s cluster with a local one in your laptop, where you can actually work live. We will replace the myhero-ui microservice running in your k8s cluster with a new myhero-ui service deployed locally in your laptop.
Before running the new local deployment please find out what is the public IP address assigned to myhero-app in your k8s cluster (you will need it as a parameter when you run the new myhero-ui):
kubectl get service myhero-app
Now you can replace the remote myhero-ui with your local myhero-ui (please make sure to replace the public IP address of myhero-app provided as an environment variable in the command below):
cd myhero_ui/apptelepresence --swap-deployment myhero-ui --expose 80 --docker-run -p=80 -v$(pwd):/usr/share/nginx/html -e "myhero_app_server=http://<myhero-app_public_IP>" -e "myhero_app_key=SecureApp" <your_DockerHub_user>/myhero-ui
Parameters indicate what is the port used by the remote deployment (-expose), what port uses the local container (-p), mapping of the application directory from the local host to the container, required environment variables (myhero-app URL or public address, and shared private key), and finally your myhero-ui image.
You will probably be asked for the admin password in your computer OS, to allow the creation of a new local container. Once you provide it the terminal will start logging your local myhero-ui execution.
Open a new terminal and check the public IP address of your myhero-ui service:
kubectl get service myhero-ui
Now point your browser to that Public IP address and you should see myhero app working as before.
From the second terminal window go to the application directory:
cd myhero_ui/app/views
Let's modify the code of your myhero-ui microservice frontpage, by editing main.html:
vi main.html
In the second line you will find a line that says:
Make your voice heard!
Modify it by swapping voice to VOICE:
Make your VOICE heard!
Save the file. Please note this is just an example of a simple change in the code, but it would work in the same way for any other code change. And you are modifying your code live!
Refresh your browser and you will automatically see the updated header (shift+refresh for a hard refresh) from your local myhero-ui.
Let's review what is happening: requests going to myhero-ui service public IP address are automatically redirected to your local myhero-ui deployment (where you are developing live), which in turn transparently interact with all the other myhero microservices deployed in the remote k8s cluster.
Ain't it amazing?!!

Once you are happy with all code changes you could rebuild and publish the image for future use:
cd myhero-uidocker build -t your_DockerHub_user/myhero-uidocker push your_DockerHub_user/myhero-ui
When you are done testing your local deployment, go to your first terminal window and press ctrl+c to stop Telepresence. You might get asked for your computer OS admin password again, to exit the local container. At this point the remote k8s cluster will automatically restore the remote deployment with its own original version of myhero-ui. That way, after testing everything remains as it was before we deployed our local instance with Telepresence. Really useful !!!
See you in my next post, stay tuned!
Any questions or comments please let me know in the comments section below, Twitter or LinkedIn.
We'd love to hear what you think. Ask a question or leave a comment below.
And stay connected with Cisco DevNet on social!
Twitter @CiscoDevNet | Facebook | LinkedIn
Visit the new Developer Video Channel
 Горячие метки:
containers
Kubernetes
docker