






You've created your own AI-powered GPT chatbot using OpenAI's ChatGPT technology. And you think your GPT might prove helpful or interesting to other people. Now that OpenAI's GPT store is open for business, you can publish your GPT so that other ChatGPT subscribers can take it for a spin. And if your GPT is popular enough, you may even earn a bit of money from it down the road, though OpenAI hasn't revealed any details on that option just yet.
Also: Here's how to create your own custom chatbots using ChatGPT
Any ChatGPT subscriber can create and publish their own GPT. Before you can publish a GPT using the Builder profile tool, you'll need to verify your profile with either your name or a website domain. After being verified, you'll be able to post your chatbot for other subscribers to see.
You can create as many custom GPTs as you like. However, there are some rules and restrictions about the types of chatbots you can develop. Before you dive in, review OpenAI's usage policies, paying special attention to the sections on Building with ChatGPT and GPT Store.
First, you need to be a ChatGPT Plus, Enterprise, or Team subscriber. A free account won't cut it. To check your plan, sign in at the ChatGPT website. Click your name at the bottom of the left sidebar and select My Plan. If you're using the free flavor of ChatGPT and want to upgrade, click Upgrade plan at the bottom of the sidebar and choose the plan you want to use.
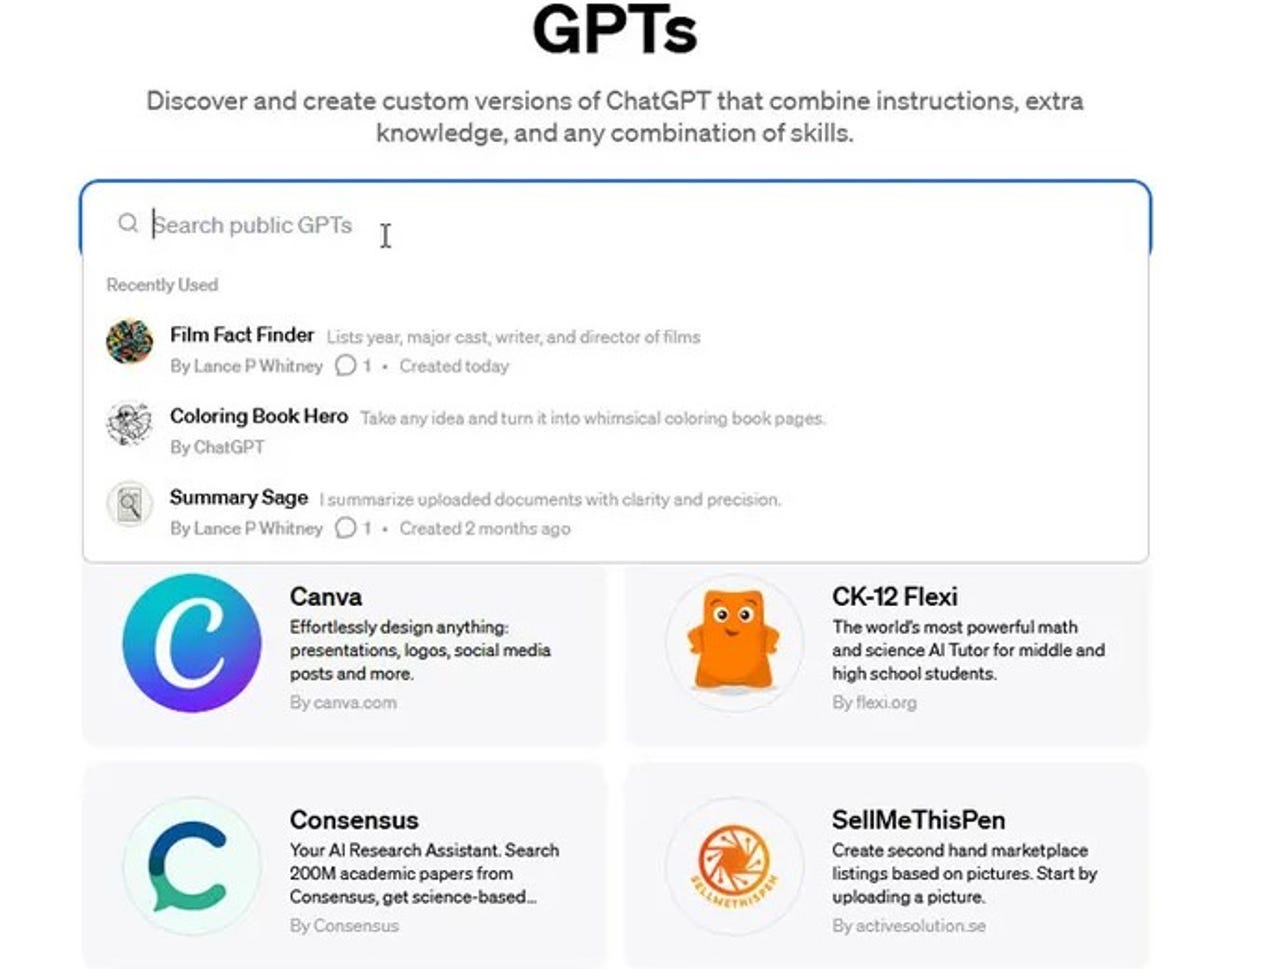
If you're already created a GPT you want to publish, great. If not, maybe you're not sure what type of GPT you want to build? To get some inspiration, look at the ones that other people have devised. At your ChatGPT page, click Explore GPTs near the top of the left sidebar. That takes you to the GPT store where you can review the current crop. While you're here, make sure that any GPTs you already have in mind don't duplicate ones already in the store.
Next, verify your Builder profile so that you can publish your GPT for everyone to see. To do this, click your name at the bottom of the sidebar and select Settings & Beta. Click the option for Builder profile. Choose your name to publish GPTs under your name. To publish under a website instead, click the drop-down box for Select a domain and choose a verified domain to use.
While you're here, check the box to receive feedback if you'd like ChatGPT subscribers to be able to contact you via email. Close the Settings window when done.
To develop your custom GPT, click your name at the bottom of the sidebar and select My GPTs. On the My GPTs page, select the option at the top for Create a GPT. The GPT Builder tool pops up to guide you through the process. To see all the steps for cooking up your GPT, check out my article on Here's how to create your own custom chatbots using ChatGPT.
You can publish your GPT immediately after creating it or publish it after you've already saved it privately. To publish it immediately, click the Save button in the upper right and choose Everyone. The GPT Builder selects a default category to classify your GPT based on its purpose. To change it, click the existing category and choose another one. Then click Confirm.
Also: How to use ChatGPT to write code
Maybe you've already saved your GPT so that only you can access it. In that case, you can change the audience so that all GPT subscribers can see it in the store. Click your name at the bottom of the left sidebar and select My GPTs. Click the Edit GPT icon for the GPT you want to publish. At the next screen, click the Save button in the upper right and change the selection to Everyone. Confirm or change the category and then click Confirm.
After a review process by OpenAI, your GPT will show up in the GPT Store. To check, click Explore GPTs in the sidebar. You can always browse the category that your GPT was assigned. But an easier option is to search for it. In the search field, start typing the name of your GPT or your own name or domain name depending on which one you chose in the Profile builder.
Though you should have already tested out your GPT when you created it in the GPT Builder, you can now test it live. Click your GPT to open it and submit any appropriate questions or requests to make sure it's working properly.
To check the status of your GPT, click your name at the bottom of the sidebar and select My GPTs. Here, you can see how many people have chatted with your GPT. Click the Edit GPT icon and you can modify any aspect of your GPT, including the name and instructions. You're also able to change the audience to only you, anyone with a link, or everyone. Back at the My GPTs screen, click the ellipsis icon and you can delete the GPT if you wish.
 Горячие метки:
Искусственный интеллект
3. Инновации