







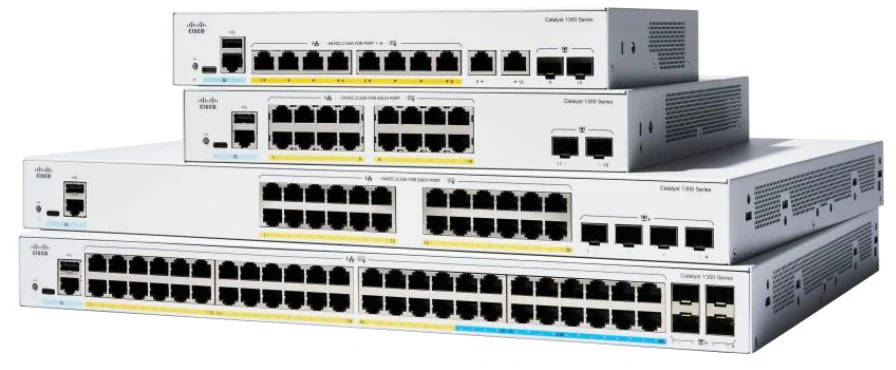
Терез 88pl99ace1Cisco Catalyst 1300 Series switches are an integral part of many network infrastructures, known for their reliability, scalability, and robust feature set. For network administrators, understanding the default settings, including the default IP address, is crucial for configuring and managing these switches effectively. This article will provide an in-depth look at the Cisco Catalyst 1300 Series default IP address, its significance, how to configure it, and best practices for managing your network switches.
When you first set up a Cisco Catalyst 1300 Series switch, it is configured with default settings, including a default IP address. The default IP address is a critical component that allows network administrators to access the switch's management interface, usually through a web browser- либоcommand-line interface (CLI(1).
For many Cisco Catalyst switches, including some in the 1300 Series, the default IP address is often set to 192.168.1.1 or 192.168.1.254. However, this can vary depending on the specific model and configuration provided by the network installer or the device’s firmware version. If your switch doesn’t have a pre-configured IP, it may default to obtaining an IP address via DHCP.
The default IP address is important for several reasons:
Initial Configuration: The default IP address is used to perform the initial configuration of the switch. By accessing the switch through this IP, administrators can set up the device, configure VLANs, manage ports, and apply security settings.
Управление сетью: Regular management tasks such as monitoring, firmware updates, and troubleshooting are often performed via the switch’s management interface, which is accessed through the default IP address.
Устранение неисправностей: Knowing the default IP address is essential when troubleshooting connectivity issues. If the switch is not functioning as expected, accessing it through the default IP can help diagnose and resolve problems.
Accessing your Cisco Catalyst 1300 Series switch through its default IP address is a straightforward process. Here’s how to do it:
Before accessing the switch, you need to physically connect your computer to the switch. This can be done using an Ethernet cable. Plug one end of the cable into your computer's network port and the other end into one of the switch's Ethernet ports.
To communicate with the switch, your computer’s IP address needs to be on the same subnet as the switch’s default IP address. If the switch’s default IP is 192.168.1.1, for instance, you should set your computer’s IP address to something like 192.168.1.10, with a subnet mask of 255.255.255.0. This can be done through your computer's network settings.
Once your computer is configured, open a web browser and enter the switch’s default IP address into the address bar (e.g.,http://192.168.1.1). If prompted, enter the default login credentials, which are often "admin" for both the username and password. This will give you access to the switch’s management interface.
If you prefer using the command-line interface, you can connect to the switch via a console cable or through a Telnet/SSH session using the default IP. Use a terminal emulator like PuTTY to initiate the connection. Enter the default IP address as the host and connect via the appropriate protocol (Telnet or SSH). You will then be prompted for the login credentials.
While the default IP address is useful for initial setup, it is generally recommended to change it to an IP address that aligns with your network’s addressing scheme. Here’s how to change the IP address on a Cisco Catalyst 1300 Series switch:
First, access the switch’s management interface through the default IP as described above.
If you are using the CLI, enter configuration mode by typing the following command:
Включить новые функции
Настройка терминала
Navigate to the interface you wish to configure, typically the management VLAN (often VLAN 1), and assign a new IP address. For example:
interface vlan 1
ip address 192.168.10.1 255.255.255.0
Replace “192.168.10.1” with the IP address you wish to use, and ensure it fits within your network’s IP addressing scheme.
After configuring the new IP address, save the changes to the switch’s startup configuration to ensure the settings persist after a reboot:
write memory
To ensure the effective management and security of your Cisco Catalyst 1300 Series switches, it’s important to follow best practices when dealing with IP settings:
The default IP address is well-known, which could pose a security risk if left unchanged. Always change the default IP address to something unique and secure to prevent unauthorized access.
For critical network devices like switches, it’s advisable to assign static IP addresses rather than relying on DHCP. This ensures that the switch’s IP address remains consistent, making management and monitoring easier.
Keep a detailed record of all IP addresses assigned to network devices, including switches. This documentation will be invaluable for troubleshooting, network audits, and future upgrades.
Enhance security by implementing access control lists (ACLs) on the switch’s management interface. This limits access to the switch to authorized devices and prevents unauthorized changes to the configuration.
Keep the switch’s firmware up to date to protect against vulnerabilities and ensure compatibility with the latest network technologies. Cisco regularly releases updates that include security patches and new features.
Even with careful configuration, issues can arise with IP settings on your Cisco Catalyst 1300 Series switch. Here are some common problems and how to resolve them:
If you cannot access the switch using the default IP address, consider the following steps:
Check Connectivity: Ensure that your computer is correctly connected to the switch and that your IP settings are on the same subnet as the switch.
Reset the Switch: If all else fails, you may need to reset the switch to its factory settings. This will revert all settings, including the IP address, back to the defaults.
If multiple devices on the network share the same IP address, an IP conflict will occur, leading to connectivity issues. To resolve this:
Identify the Conflict: Use network tools to identify the conflicting devices.
Change the IP Address: Reassign a unique IP address to one of the devices to resolve the conflict.
If the switch loses its configuration after a reboot, it may not have saved the changes properly. Always ensure you use the correct commands to save configurations to the startup configuration.
Understanding and managing the default IP address on Cisco Catalyst 1300 Series switches is essential for effective network administration. The default IP provides the initial access to the switch’s management interface, allowing you to configure, monitor, and secure your network infrastructure.
By following best practices such as changing the default IP, using static IP addresses, and securing access, you can ensure that your Cisco Catalyst 1300 Series switches operate efficiently and securely. Troubleshooting and maintaining proper documentation are also key to preventing and resolving network issues.
Whether you are setting up a new switch or managing an existing network, mastering the default IP settings on your Cisco Catalyst 1300 Series switches is a foundational skill that will serve you well in maintaining a robust and reliable network environment.
Cisco Catalyst 1300 Series Switches
For Cisco product list and quote, please visit: https://www.hi-network.com/categories/cisco or contact us at www.hi-network.com (Email: [email protected])
 Горячие метки:
CISCO коммутаторы CISCO